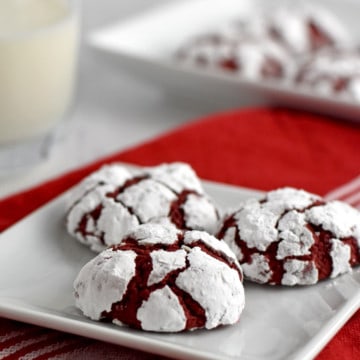
These Gluten Free Red Velvet Crinkle Cookies are soft and tender in the middle and crisp around the edges. They’re great for Valentine’s Day, Christmas, and any time you want to make someone’s day special.
If you’re a fan of crinkle cookies, you’ll also want to try my Gluten Free Chocolate Crinkle Cookies. And if you need more Valentine’s Day cookies, try my Frosted Powdered Sugar Cookies.
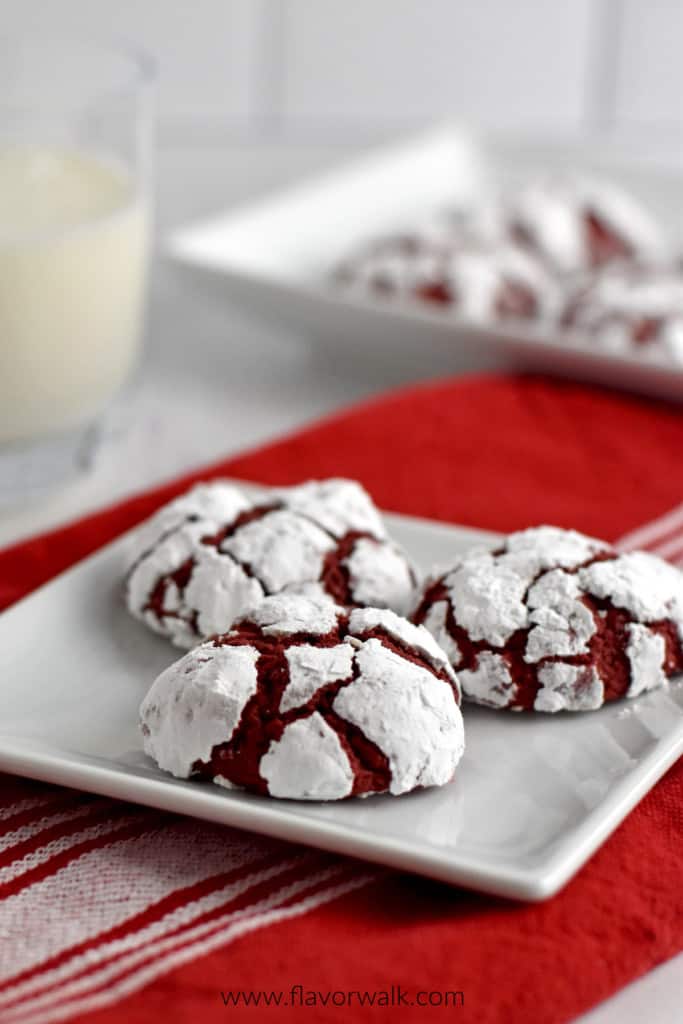
Recently I shared with you my Gluten Free Red Velvet Brownies and it motivated me to bake some cookies with a similar red velvet flavor. These crinkle cookies are the result of that inspiration.
If you’re familiar with crinkle cookies, you know it’s the powdered sugar that gives them those cracks and crevices. Coating the dough balls well, with the powdered sugar, will give them that classic look.
The mild flavor of the cocoa powder and the sweetness of the powdered sugar makes a tasty treat. And, the red and white color, giving the cookies a festive look, is sure to brighten anyone’s day.
These cookies are fun to make, but be careful when you’re working with the red food color. Wearing an apron is helpful in preventing clothing stains.
(This post contains affiliate links. Read my disclosure policy here.)Ingredients
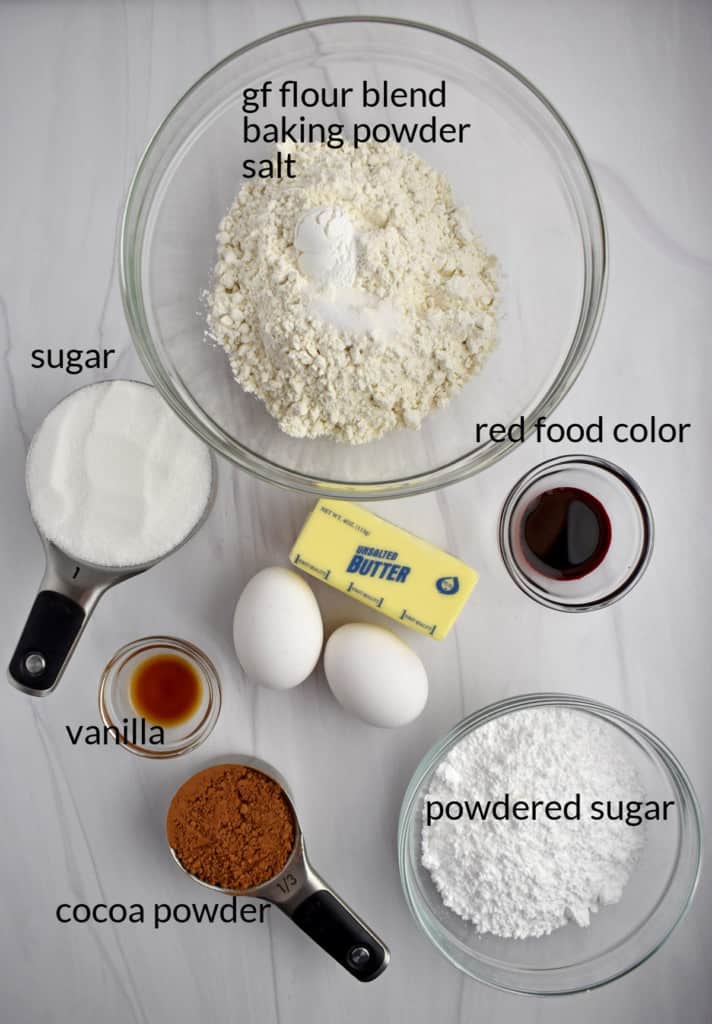
Gluten Free Flour Blend - I like Bob’s Red Mill because it contains xanthan gum. If your gluten free flour doesn’t contain xanthan gum, try adding ½ teaspoon to the recipe.
Cocoa Powder - Unsweetened cocoa powder. I use Hershey’s cocoa powder.
Baking Powder - The use of baking powder gives the cookies a soft texture.
Salt - Table salt.
Butter - Unsalted butter, softened. By using unsalted butter, you get to control the amount of salt in the recipe.
Sugar - White granulated sugar.
Eggs - Use room temperature eggs.
Red Food Coloring - The red food coloring gives the cookies the typical red velvet color.
Vanilla - Pure vanilla extract.
Powdered Sugar - Also known as confectioners’ sugar, gives the cookies that classic crinkle appearance.
Resources found on Amazon to help you
- Mixing Bowls - This set comes with all the bowl sizes I need. I love how they nest inside each other making them easy to store.
- Baking Pan with Cooling Rack - This set comes with both the baking pan and cooling rack. I have a few of these sets and I use them all the time.
- Electric Hand Mixer - I use this whenever I need to mix ingredients and don’t want to get out my stand mixer.
Gluten Free Red Velvet Crinkle Cookies
- Whisk together the gluten free flour, cocoa powder, baking powder, and salt in a medium bowl.
- In a large bowl, beat together the butter and granulated sugar.
- Add eggs, food color, and vanilla and beat until combined.
- On low speed, beat in the flour until combined.
- Refrigerate dough for at least 2 hours.
- Roll the dough into balls and coat with powdered sugar.
- Bake for 10-12 minutes.
Step By Step Instructions
In a medium mixing bowl, whisk together gluten free flour blend, cocoa powder, baking powder, and salt (photos 1 & 2).
In a large mixing bowl, beat together butter and granulated sugar until light and fluffy.
Add eggs, food color and vanilla and beat until completely combined (photos 3 & 4).
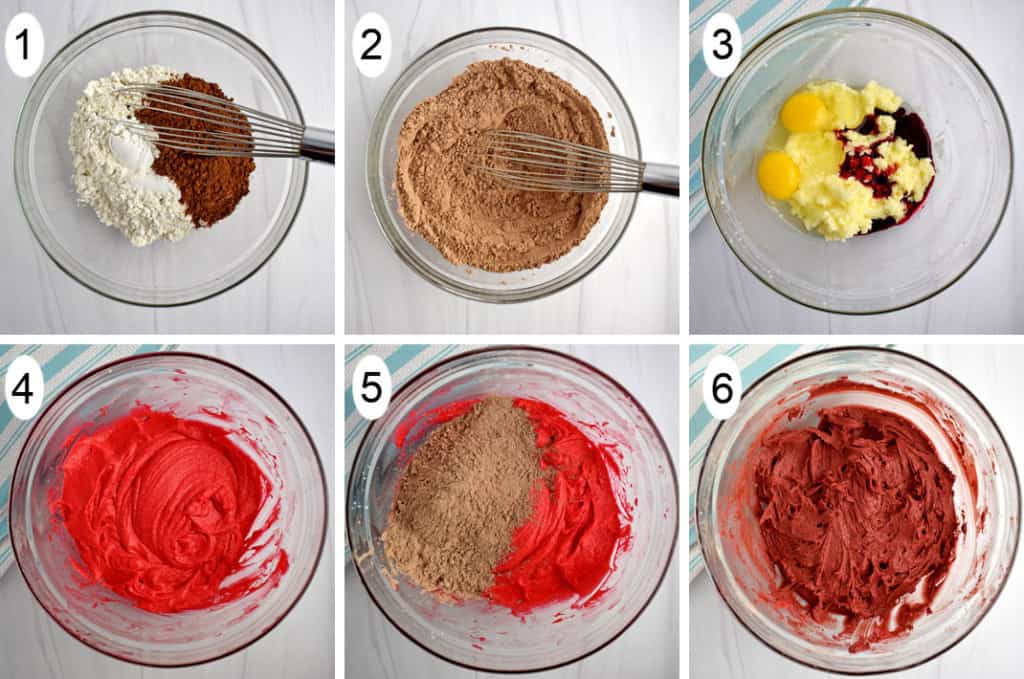
Beat in half the flour mixture, on low speed, until combined. Add in the remaining flour mixture and continue beating until combined (photos 5 & 6). Use a rubber spatula to scrape down the sides of the bowl to incorporate all the flour into the dough.
Cover the bowl with plastic wrap and refrigerate for at least 2 hours.
When you're ready to bake the cookies, preheat the oven to 350° F. Line baking pans with parchment paper or spray with non-stick cooking spray.
Place the powdered sugar in a small bowl. Roll the dough into 1-inch balls, then roll the dough balls in the powdered sugar and coat completely. Place on the prepared pans 2-inches apart.
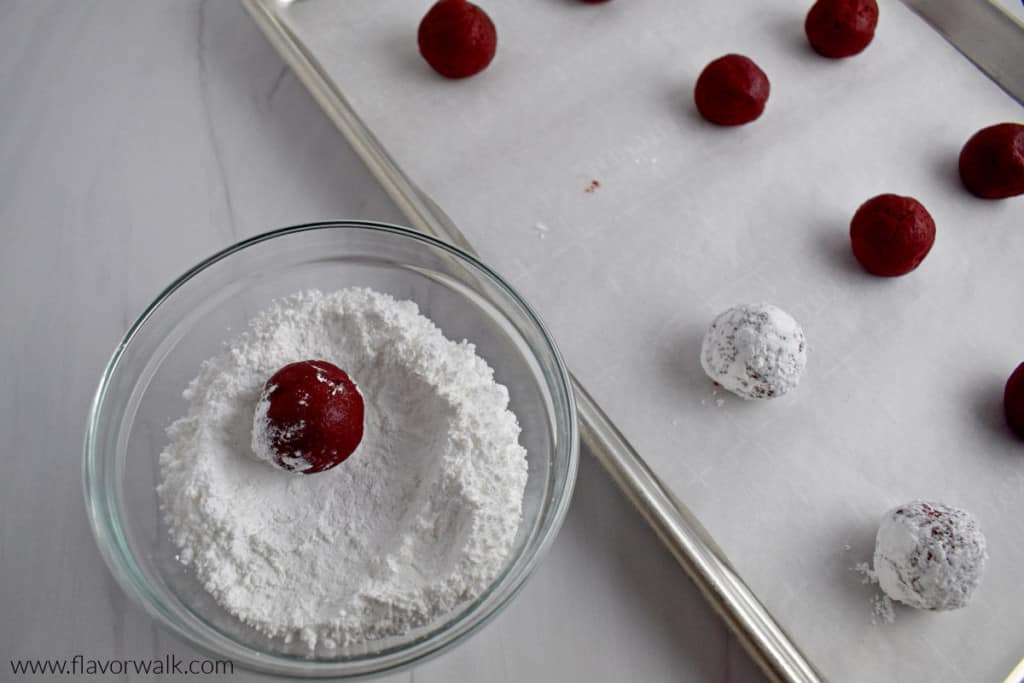
Bake for 10-12 minutes until the edges are set. Allow the cookies to rest on the hot baking pans for 2 minutes, then transfer to a wire rack to cool completely.
Baker’s Tips
- Use room temperature butter and eggs. Even though you’re going to refrigerate the dough, room temperature ingredients will mix together more easily and completely.
- Chill the dough for at least 2 hours. You can make the dough ahead of time, refrigerate overnight, and roll and bake the cookies the next day.
- Roll all the dough into balls and place them on the prepared pans. After all the dough balls are made, roll them in the powdered sugar and place them back on the pans.
- Leave the cookies on the baking pan for a couple of minutes before removing to a cooling rack. The cookies are delicate when they come out of the oven and they need a couple of minutes to finish setting up before being moved.
Do I Need to Chill the Crinkle Cookie Dough?
It’s important to chill the dough before rolling, coating, and baking. If the dough isn’t chilled it will be sticky and difficult to roll into balls, and the cookies will spread too much while they’re baking.
If you’re limited on time, you can make the dough ahead of time and place in the refrigerator. You can then roll and bake the cookies the next day.
How Should I Store Red Velvet Crinkle Cookies?
These cookies can be stored at room temperature, in an airtight container, for up to 3 days. They can also be frozen, in a freezer safe container, for up to 2 months.
Need More Gluten Free Cookie Recipes? Try these:
- Gluten Free Candy Bar Cookies
- Gluten Free Cinnamon Roll Cookies
- Chocolate Chip Peanut Butter Cookies
- Gluten Free Oatmeal Raisin Cookies
- Gluten Free Peanut Butter Oatmeal Cookies
If you tried this recipe or any other recipe on the blog, don't forget to leave a star rating and let me know how it turned out in the comments below. I really enjoy hearing from you!
You can also FOLLOW ME on Facebook, Instagram and Pinterest to see more of the delicious food I'm making!
Recipe
Gluten Free Red Velvet Crinkle Cookies
Ingredients
- 1 ⅔ cups gluten free flour blend
- ⅓ cup unsweetened cocoa powder
- 1 ½ teaspoons baking powder
- ¼ teaspoon salt
- ½ cup unsalted butter, softened
- 1 cup granulated sugar
- 2 eggs, room temperature
- 1 ½ teaspoons red food color
- 1 teaspoon vanilla extract
- 1 cup powdered sugar
Instructions
- In a medium mixing bowl, whisk together gluten free flour blend, cocoa powder, baking powder, and salt.
- In a large mixing bowl, beat together butter and granulated sugar until light and fluffy.
- Add eggs, food color and vanilla and beat until completely combined.
- Beat in half the flour mixture, on low speed, until combined. Add in the remaining flour mixture and continue beating until combined. Use a rubber spatula to scrape down the sides of the bowl to incorporate all the flour into the dough.
- Cover the bowl with plastic wrap and refrigerate for at least 2 hours.
- When you're ready to bake the cookies, preheat oven to 350° F. Line baking pans with parchment paper or spray with non-stick cooking spray.
- Place the powdered sugar in a small bowl. Roll the dough into 1-inch balls, then roll the dough balls in the powdered sugar and coat completely. Place on the prepared pans 2-inches apart.
- Bake for 10-12 minutes until the edges are set. Allow the cookies to rest on the hot baking pans for 2 minutes, then transfer to a wire rack to cool completely.
Notes
- Use room temperature butter and eggs. Even though you’re going to refrigerate the dough, room temperature ingredients will mix together more easily and completely.
- Chill the dough for at least 2 hours. You can make the dough ahead of time, refrigerate overnight, and roll and bake the cookies the next day.
- Roll all the dough into balls and place them on the prepared pans. After all the dough balls are made, roll them in the powdered sugar and place them back on the pans.
- Leave the cookies on the baking pan for a couple of minutes before removing to a cooling rack. The cookies are delicate when they come out of the oven and they need a couple of minutes to finish setting up before being moved.
Nutrition
Nutrition Disclaimer
Nutritional information provided is an estimate and will vary based on products and brands you use. You should calculate the actual nutritional information with the ingredients you are using with your preferred nutrition calculator.
This recipe was adapted from McCormick.



Comments
No Comments