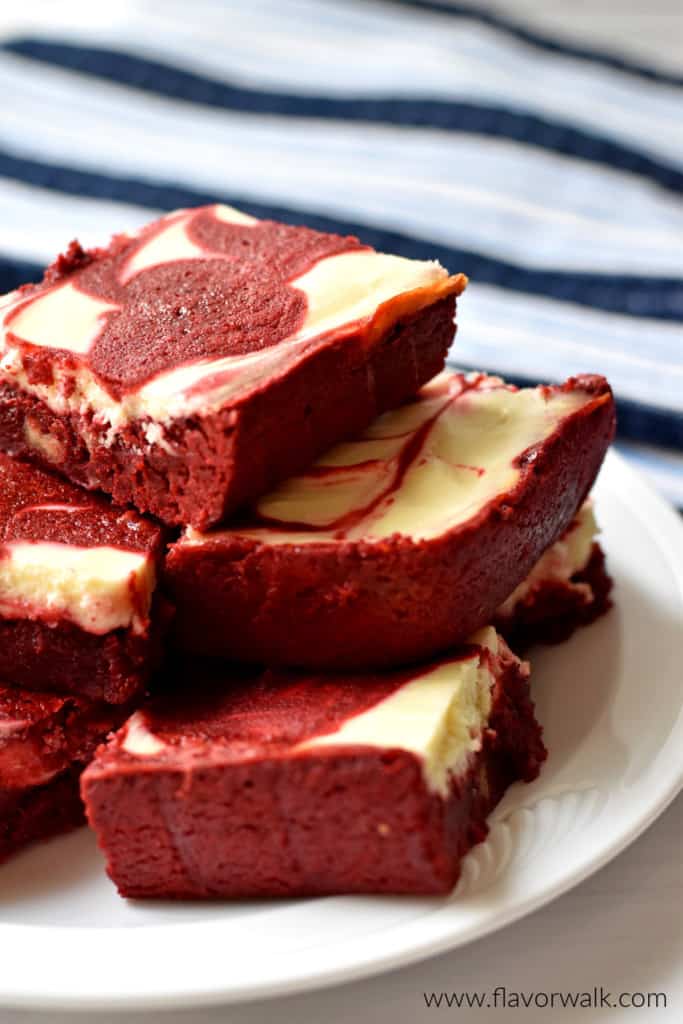
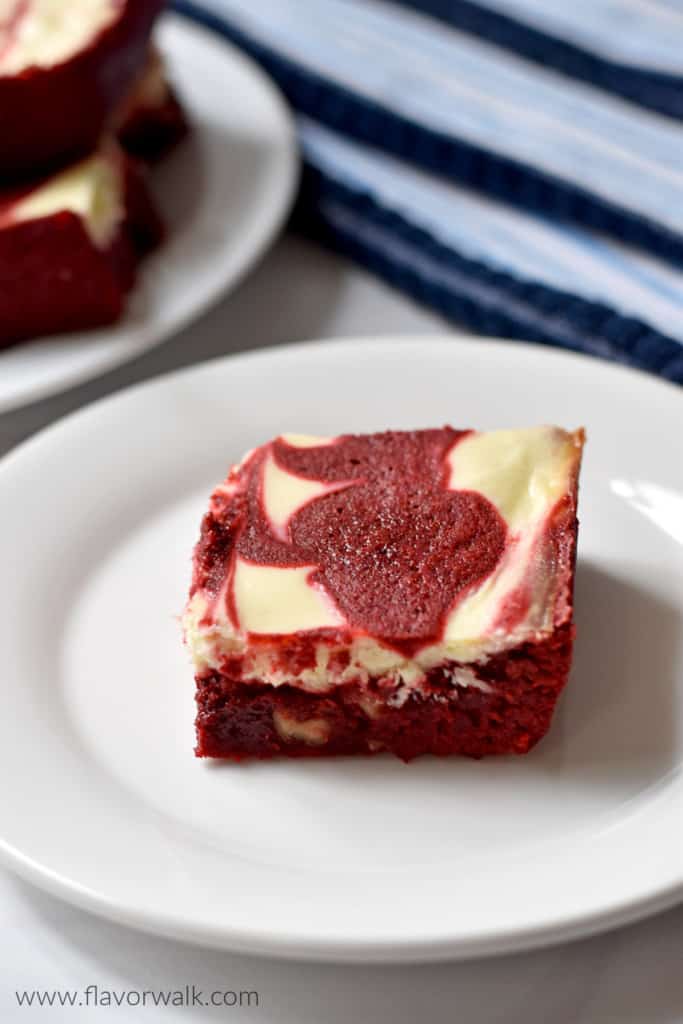
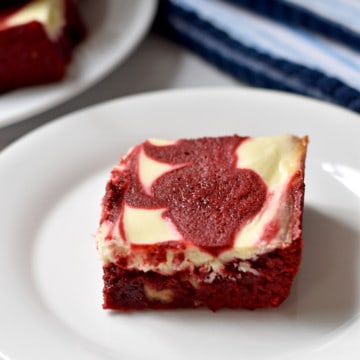
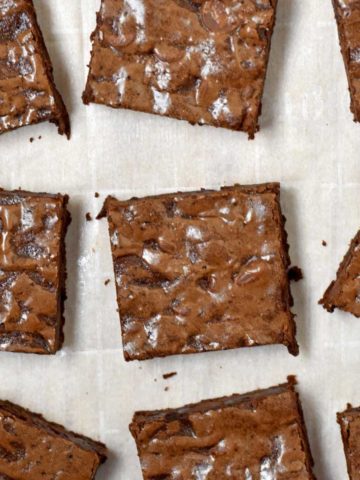
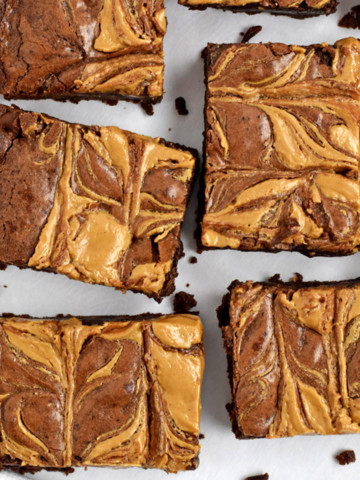
These Gluten Free Red Velvet Brownies are rich, decadent, and impossible to resist. The fudgy brownie bottom is topped with a cream cheese layer swirled together with dollops of brownie batter. They're a sweet, indulgent, treat.
If you like the smooth texture cream cheese adds to sweet treats, I have more recipes you'll want to try. My Chocolate Brownie Cheesecake and No Bake Oreo Cheesecake have cream cheese in the dessert. And my Gluten Free Pumpkin Bars and Gluten Free Banana Cake are topped with cream cheese frosting.
It's been a while since I shared a brownie recipe with you. And, since Valentine's Day is just around the corner, these red velvet brownies swirled with cream cheese seemed like a great choice.
The red colored brownie layer, white cream cheese layer, and swirl on top make a very festive looking dessert. The slight acidic flavor from the vinegar and cream cheese, blends together so well with the sweetness and mild chocolate flavor in the brownie.
If you want a new recipe to add some flair to your Valentine's celebration, or simply want to brighten any day, you need to try these brownies. You won't be disappointed when you do.
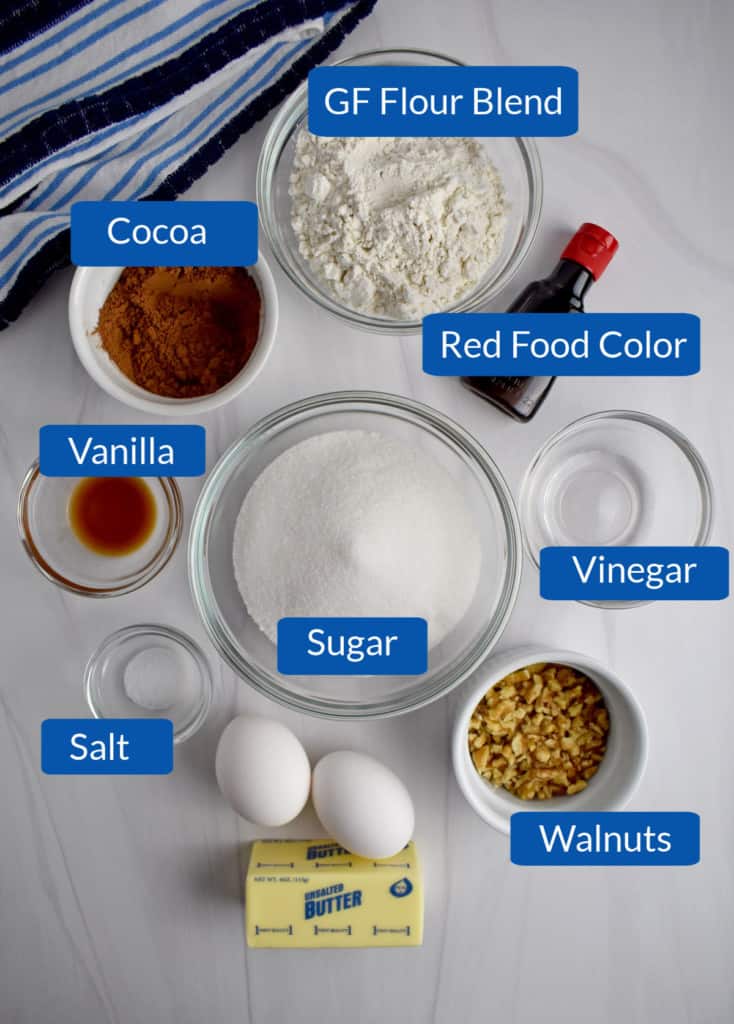
Ingredients for the Brownie Layer
- Butter - Unsalted butter, melted. Using unsalted butter allows you to control the amount of salt in the recipe.
- Sugar - White granulated sugar.
- Vanilla - Pure vanilla extract.
- Cocoa - Unsweetened cocoa powder. I use Hershey's cocoa powder.
- Salt - Table salt.
- Red Food Coloring - The red food coloring gives the brownies that classic red velvet color.
- Vinegar - Distilled white vinegar.
- Eggs - Use room temperature eggs.
- Gluten Free Flour Blend - I normally use Bob's Red Mill in my recipes. I haven't tried the recipe with almond or coconut flour.
- Nuts - I used walnuts in this recipe. You could also use almonds or pecans with little change to the flavor.
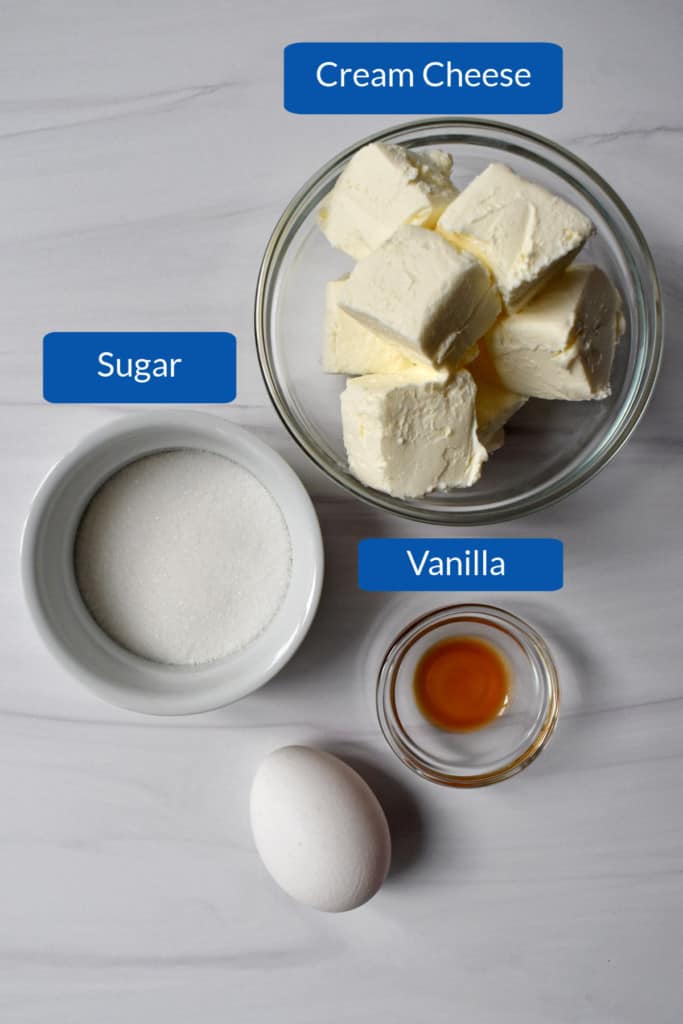
Ingredients for the Cream Cheese Layer
- Cream Cheese - Softened and cut into cubes.
- Sugar - White granulated sugar.
- Egg - Use a room temperature egg.
- Vanilla - Pure vanilla extract.
Resources found on Amazon to help you
- Mixing Bowls - I use these for just about everything I make.
- Baking Pan - This glass pan distributes the heat well which leads to more evenly-baked brownies.
- Electric Hand Mixer - I use this whenever I need to mix ingredients and don't want to get out my stand mixer.
Gluten Free Red Velvet Brownies
- Stir together the melted butter and sugar in a large mixing bowl.
- Add the vanilla, cocoa powder, salt, food coloring, and vinegar, one at a time, stirring between each addition.
- Whisk the eggs and stir into the batter.
- Stir in the flour and fold in the nuts.
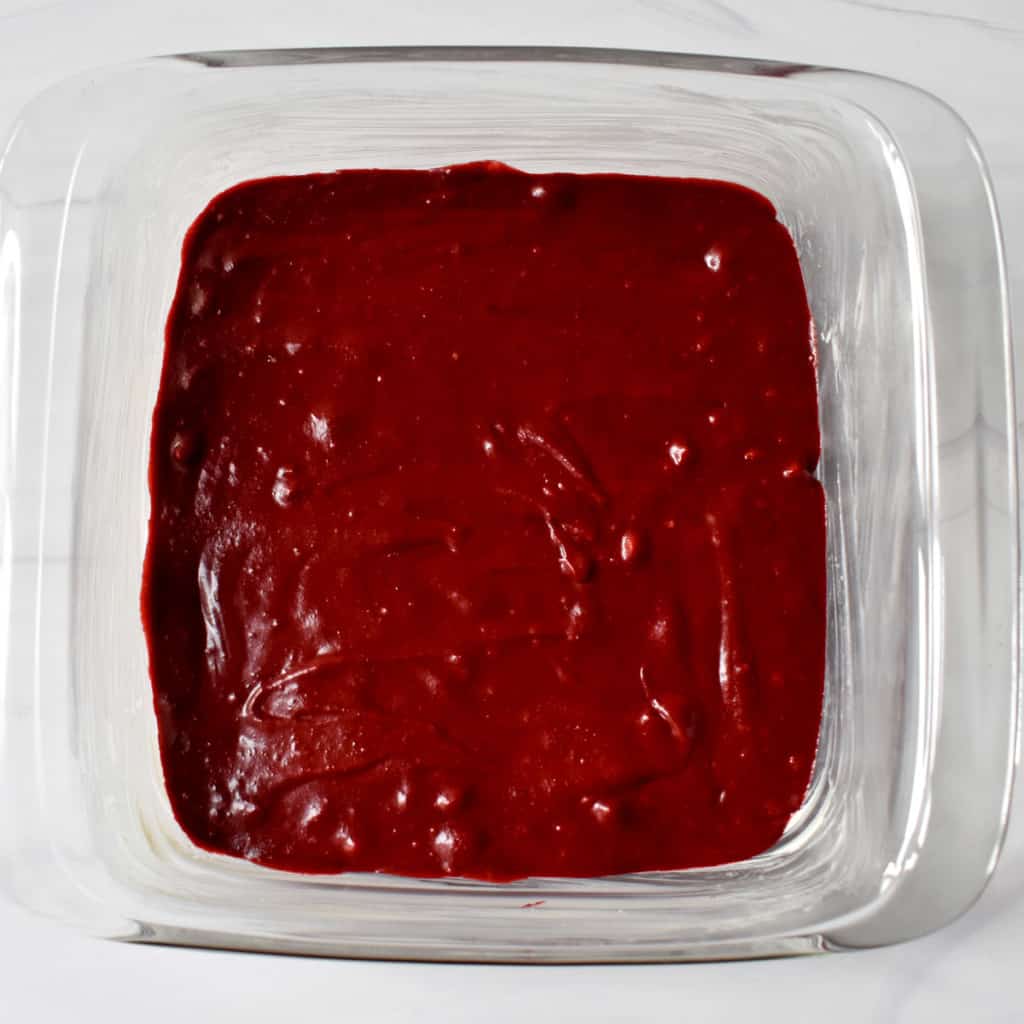
- Reserve ¼ cup of the batter and pour the rest into the prepared pan.
- Beat the cream cheese, sugar, egg, and vanilla until smooth.
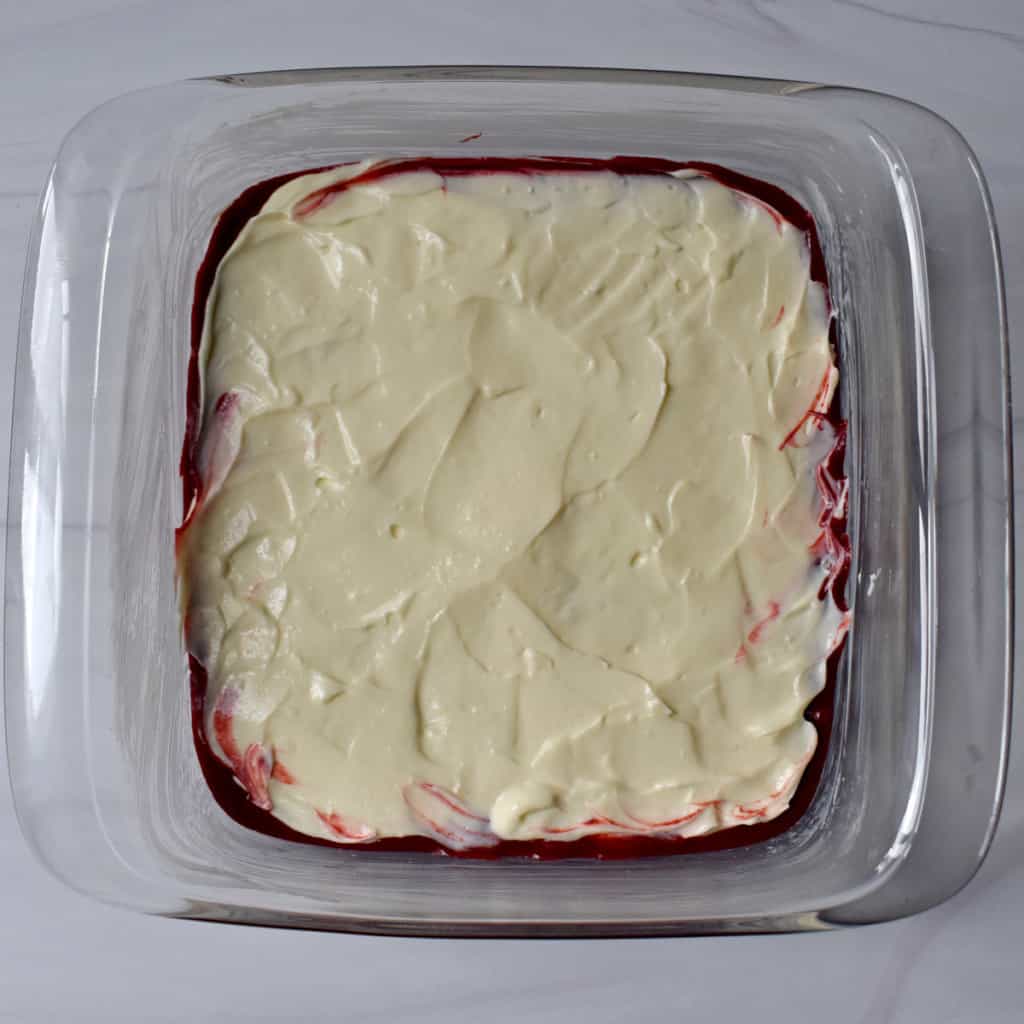
- Spread the cream cheese mixture over the brownie layer.
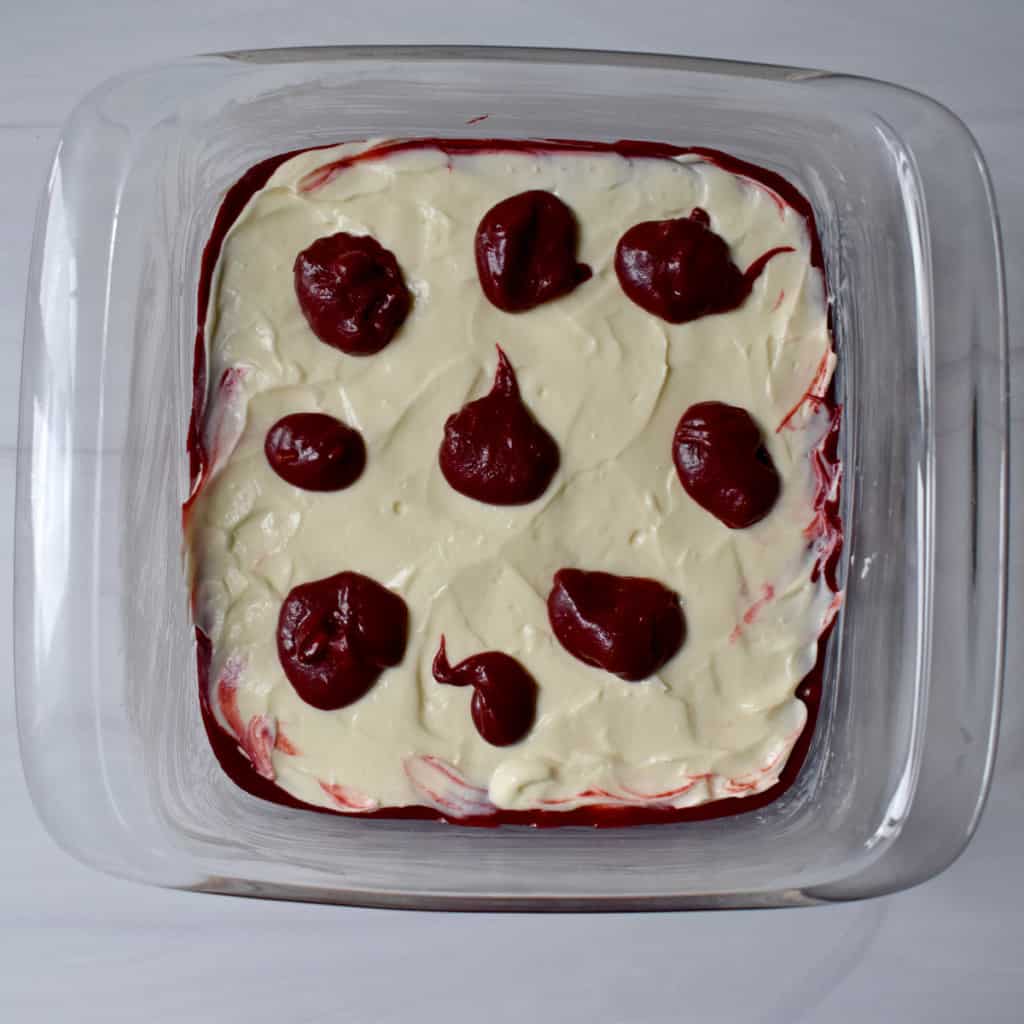
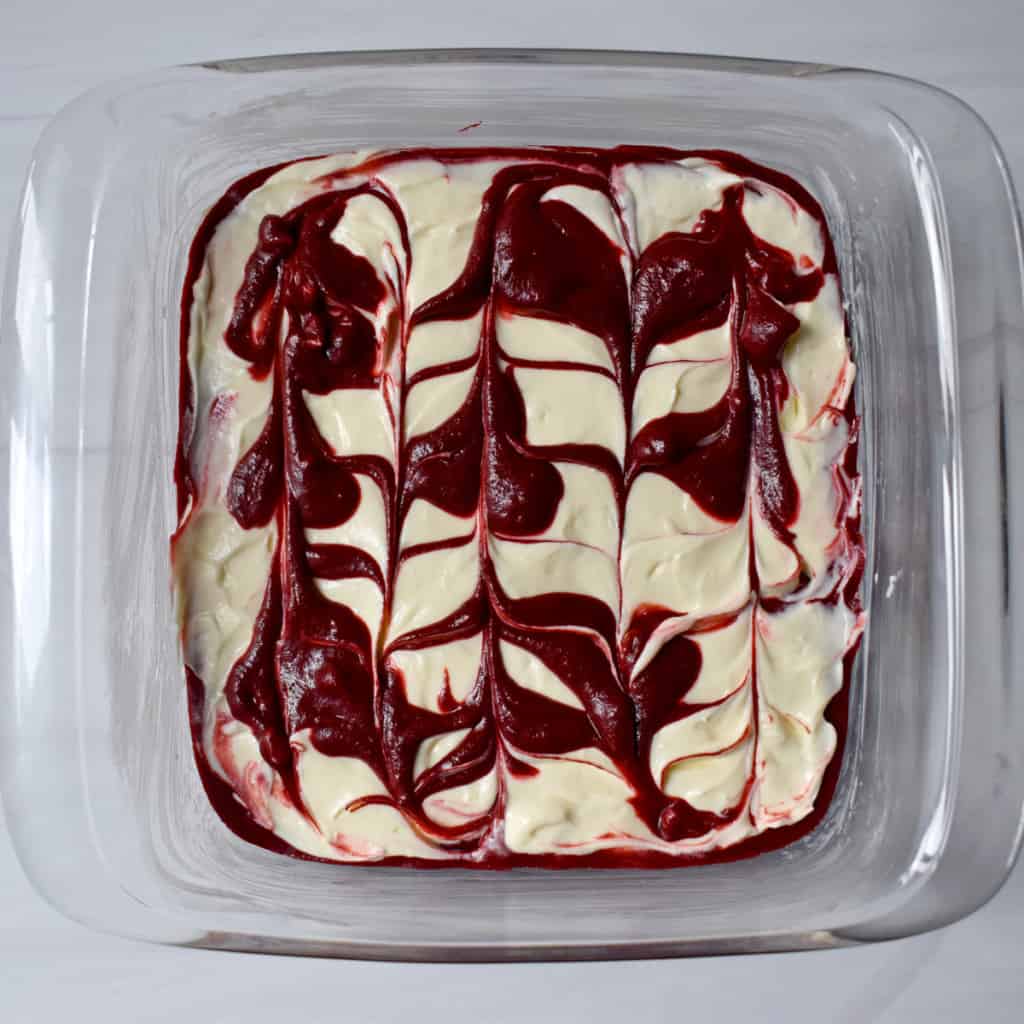
- Drop the reserved batter on top of the cream cheese layer and create a swirl.
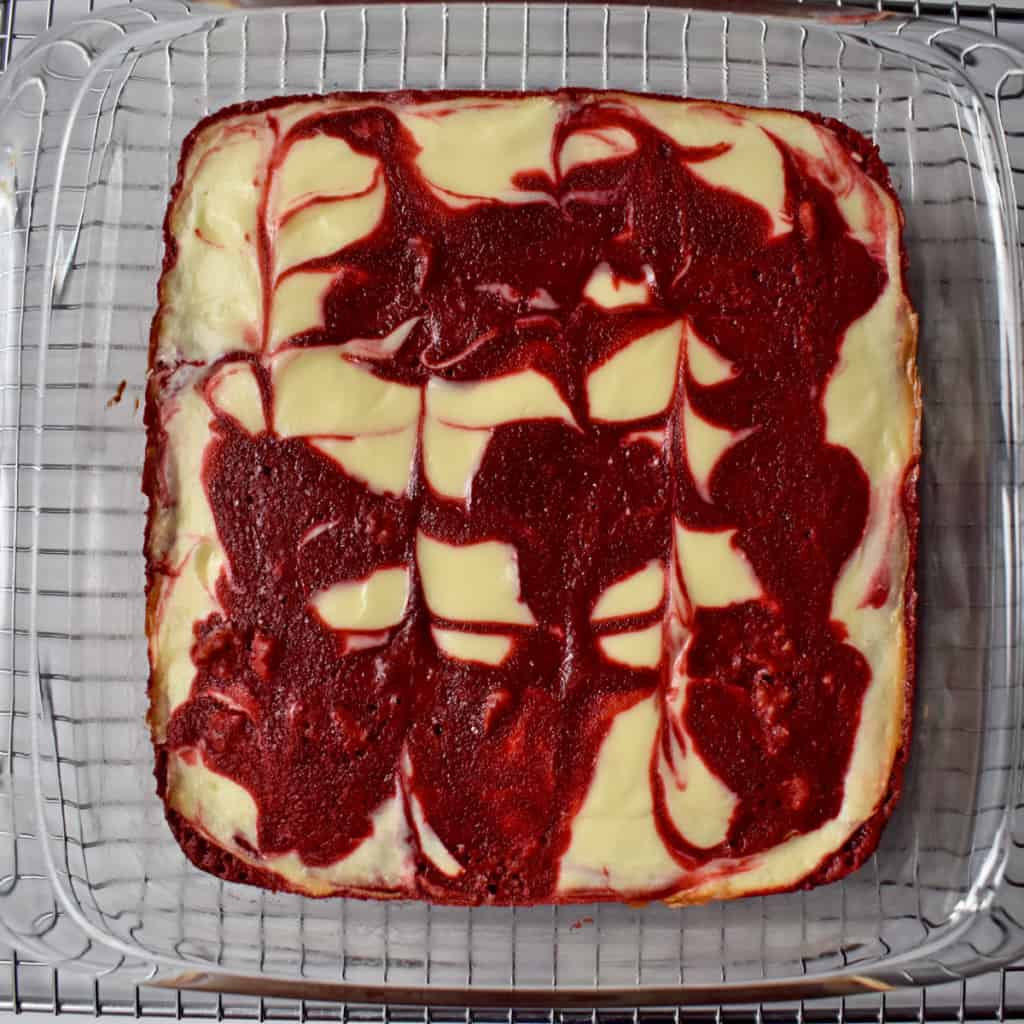
- Bake for 30 minutes.
Step By Step Instructions
Start by preheating your oven to 350-degrees and grease an 8x8" baking pan.
Melt the butter, then place in a large mixing bowl. Add 1 cup sugar and stir together.
Add the next 5 ingredients, one at a time, and stir until combined. Whisk together the eggs and stir into the brownie batter.
Stir in the flour until just combined then fold in the nuts. Reserve ¼ up of the batter and pour the rest of the batter into the pan.
Beat the cream cheese, ¼ cup sugar, egg, and vanilla until smooth. With a table knife or spatula, gently spread the cream cheese mixture over the brownie layer.
Drop tablespoons of the remaining brownie batter over the cream cheese layer.
Draw lines through the cream cheese mixture to create a swirled design.
Bake for 30 minutes or until the edges are golden. Allow to cool completely on a wire rack.
Baker's Tips
- Check the ingredients of your gluten free flour blend for xanthan gum. If your flour mix doesn't contain xanthan gum, try adding ¼ teaspoon to the recipe.
- Use room temperature eggs. The eggs will mix more easily into the batter when they're at room temperature.
- Don't stress about the swirl on the top of the brownies. Every time I swirl the top it looks different, but the brownies still taste great.
- Cool the brownies completely before serving. It's difficult to cleanly cut warm brownies.
Place the brownies in an airtight container and store them in the refrigerator for up to 5 days. Or, if you need to keep the brownies for a longer period, you can freeze them.
To freeze the brownies, wrap them individually in plastic wrap, then place them in a freezer-safe plastic bag. The brownies will last in the freezer for up to 2 months.
More Gluten Free Brownie Recipes to Try
- Gluten Free Peanut Butter Brownies
- Rich Chocolate Pecan Brownies
- Easy Gluten Free Zucchini Brownies
- White Chocolate Coconut Brownies
- Rocky Road Gluten Free Brownies
- Gluten Free Triple Chocolate Chip Brownies
If you tried this recipe or any other recipe on the blog, don't forget to leave a star rating and let me know how it turned out in the comments below. I really enjoy hearing from you!
You can also FOLLOW ME on Facebook, Instagram and Pinterest to see more of the delicious food I'm making!
Recipe
Gluten Free Red Velvet Brownies
Ingredients
For the Brownie Layer:
- ½ cup unsalted butter
- 1 cup granulated sugar
- 1 teaspoon vanilla extract
- ¼ cup unsweetened cocoa powder
- ¼ teaspoon salt
- 1 tablespoon red food coloring
- 1 teaspoon vinegar
- 2 large eggs
- ¾ cup gluten free flour blend
- ¼ cup chopped walnuts
For the Cream Cheese Layer:
- 8 ounces cream cheese, softened
- ¼ cup granulated sugar
- 1 large egg
- ¼ teaspoon vanilla extract
Instructions
For the Brownie Layer:
- Preheat oven to 350° F and grease an 8"x8" baking pan.
- Place the butter in a saucepan, on medium heat, until completely melted.
- In a large mixing bowl, add the melted butter and sugar and stir until combined.
- Add the next 5 ingredients, one at a time, stirring after each addition.
- In a small bowl, whisk the eggs together and then stir into the brownie batter.
- Add the flour and stir until just combined and then fold in the walnuts.
- Reserve ¼ cup of the batter for the swirl, then pour the remaining batter into the prepared pan.
For the Cream Cheese Layer:
- In a medium mixing bowl, beat all the ingredients together until smooth. Using a table knife or spatula, gently spread the cream cheese mixture over the brownie layer.
- Drop tablespoons of the remaining brownie batter over the cream cheese layer. Using a table knife, draw lines through the cream cheese mixture, vertically and then horizontally, to create a swirled design.
- Bake at 350° for 30 minutes.
- Place the pan of baked brownies on a wire rack to cool completely. Cut into squares and enjoy!
Notes
- Check the ingredients of your gluten free flour blend for xanthan gum. If your flour mix doesn't contain xanthan gum, try adding ¼ teaspoon to the recipe.
- Use room temperature eggs. The eggs will mix more easily into the batter when they're at room temperature.
- Don't stress about the swirl on the top of the brownies. Every time I swirl the top it looks different, but the brownies still taste great.
- Cool the brownies completely before serving. It's difficult to cleanly cut warm brownies.
Nutrition
Nutrition Disclaimer
Nutritional information provided is an estimate and will vary based on products and brands you use. You should calculate the actual nutritional information with the ingredients you are using with your preferred nutrition calculator.
This recipe was adapted from the Food Network.
Comments
No Comments